Interior Railing System
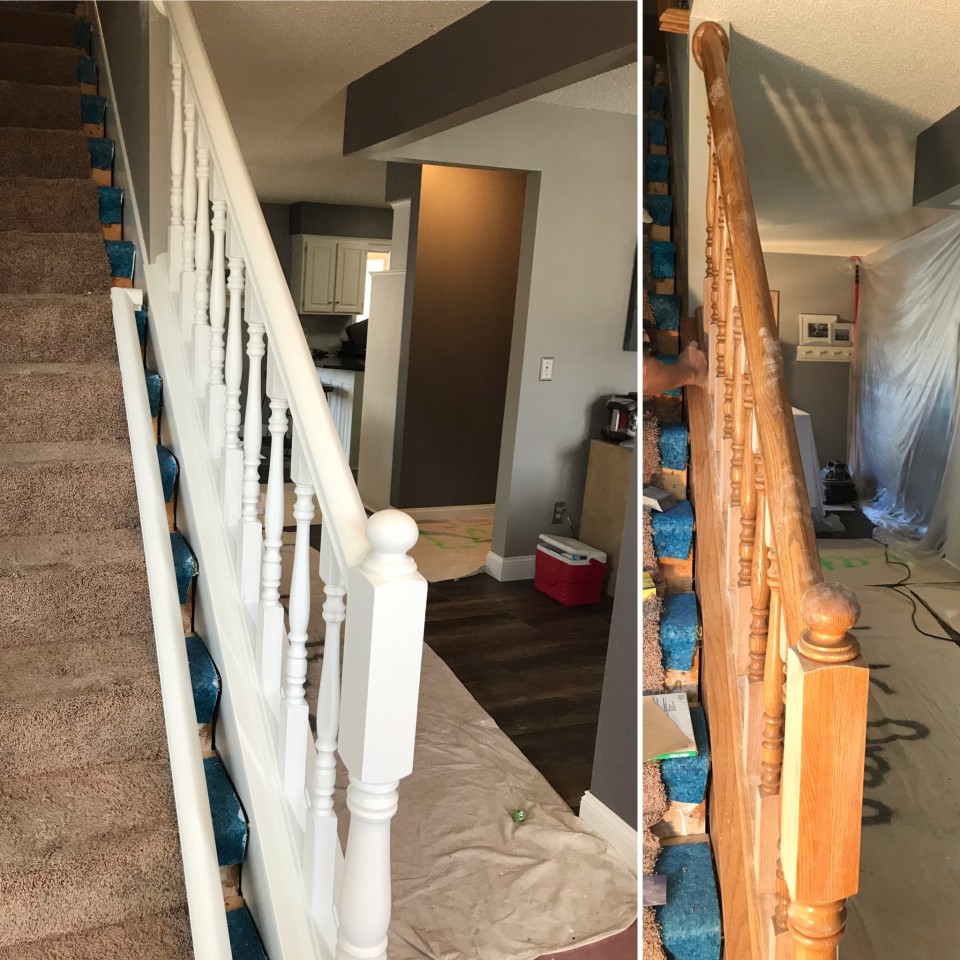
Transformed these oak railings with California Ultra Satin paint. It is a superior washable and stain resistance paint. Great for cabinets, doors and woodwork where a satin finish is desired.
Transformed these oak railings with California Ultra Satin paint. It is a superior washable and stain resistance paint. Great for cabinets, doors and woodwork where a satin finish is desired.
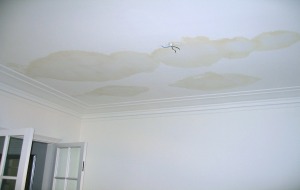
This process in and of itself has caused many people problems, pain and cost. You see the dirty little secret is that 95% of textured ceilings are installed incorrectly when the house is built. All manufacturers of sheetrock, joint or patching compound and texture recommend that new sheetrock is primed prior to installing texture. This step is usually skipped. In modern home building, ceilings are very seldom primed prior to applying texture. This practice creates major problems when you want to paint a textured ceiling. Ceilings textures are water soluble and due to lack of a primer, they have very little adhesion to the new sheetrock. Latex paints and primers are primarily water. When the texture gets wet with the paint or primer the texture can fall off of the ceiling. This is not pretty and can cause you to have to re-texture the complete ceiling.
Make sure all walls, flooring, furniture and all ceiling hardware such as lights are covered. The most difficult items to cover are the walls. We use 1.5” OR 2” Low adhesive masking tape by the 3M Company. The tape must be installed very carefully at the wall ceiling joint. Line the tape up with the texture and firmly press the tape onto the wall. We use a narrow 1.5” putty knife to secure the top edge of the tape to the wall at the ceiling line. We leave the bottom edge of the tape loose if possible in order to tuck the plastic under that edge. We use 12’ wide plastic on a 400’ roll to cover all the walls. Again you tape the wall at the ceiling line then tuck the edge of the plastic under the bottom edge of the tape. You then unfold the plastic to cover the walls all the way down to the floor.
Ready to paint? First and foremost, test the existing texture to see if it has ever been painted, there are many ways to do this. Try a putty knife edge first, gently scrape at the popcorn texture. If it has never been painted it will fall off easily, almost like a powder. You can even scrape it off with your fingernails. If the texture seams soft like it has never been painted make a 2nd test. Get a wet sponge and carefully gently wash a very small part of the ceiling. If it turns to mud and or washes off immediately you have now confirmed that the texture has not been painted. You must prime the ceiling first before painting it and you should spray the ceiling with an AIRLESS SPRAYER. You can rent one of these at your local rental store. You really should hire a contractor at this point. If the ceilings have been painted before then most of the danger described above is passed. You may only need one coat of paint and you can roll the new paint onto the ceiling. Use a heavy nap roller ¾”-1” nap. Take your time don’t miss any spots.
Priming and Painting an unpainted textured ceiling. Call your local contractor Lake Area Painting & Decorating or rent that sprayer and learn how to use it. Suffice it to say in untrained hands you can create many more headaches than just water damage. The process and technique for rolling and/or spraying will not be discussed here.
The safest primer to use in terms of your textured ceiling not falling down is an oil based or alcohol based primer/sealer. However, if you don’t have a full face respirator you will be overcome by the fumes from the solvents. We have found in careful hands we can use a quick drying primer like (Zinsser Bulls Eye 1-2-3) or a slow drying Penetrating primer like (Zinsser-Gardz Problem Surface Sealer). When you apply these primers DO NOT OVER APPLY! If you saturate the popcorn texture it may fall. You may want to test a small area first and let it dry. This will ensure you have no problems. You want to apply a very even uniform coat. Once the primer has dried you can apply the finish paint. You don’t need expensive paint for this. Actually the cheaper the better, but make sure the color is what you want. A good product for this is Super Hide from Benjamin Moore. You can get this product at Abbott Paint and Carpet located in White Bear Lake.
Your best solution for painting your textured ceiling is to call your 5-star local painting company that has been in your neighborhood for almost 70 years, Lake Area Painting & Decorating.
Check back soon for our last blog post in the series – Removing and repairing damaged ceiling texture.

What is wrong with my windows? The bottom parts of the windows look terrible. The varnish or paint is peeling, the stain has changed color, there are black and gray rotten looking areas. Maybe all of the above.
Why is this happening?
There are many reasons from poor quality windows to just lack of maintenance on a wood window in the northern climates. The basic underlying cause is the weather. Here in Minnesota in the winter we have extreme conditions. It’s 20 Degrees outside and very dry. Its 70 degrees inside and higher humidity. If you’re lucky you have insulated double or triple pane windows, but even so. There is only about 1”-2” of glass and or wood separating your warm house from the cold outside air. That is why condensation happens, but there is more. Expansion and contraction, sun damage, wood that gets wet and won’t dry out. However, many times it’s just a lack of maintenance or a poor quality original finish of paint or varnish.
Can it be fixed?
Yes, solutions are as follows: Better windows, the better the window the fewer the problems. Keep the interior moisture down in your home however, this creates other problems. Static electricity is not fun, well maybe for the kids. The real solution is to maintain the finish or re-finish the bottom of your windows. If neglected they WILL rot and fail.
How to?
First off the wood must be dry and I mean very dry. We use a moisture meter to test the window sill, sash and jamb. Once we determine the wood is dry we break out the elbow grease..SANDING. All of the broken and cracked varnish, discolored stain, black or decayed wood must be sanded to a new fresh layer of wood. If the black or gray damage goes deep and can’t be removed with sanding then we have to break out the wood bleach. See your local paint store for this product. Open the window and inspect all the surfaces. There should be no raw wood, often times the edges of the windows were never finished when the house was built. All raw wood must be finished. So you have sanded all the damage away and dusted or vacuumed. Maybe you had to bleach but everything is very dry now. Most paint stores carry pints of stain, oil-based stains are best due to penetration and ease of use. Buy 3-5 that you think might work and test them. You may need to intermix the stain to get the correct color. Apply the stain to all the surfaces and wipe off all excess. When dry apply 4 coats of water-based polyurethane varnish to all raw or stained areas. Make sure you have the correct sheen and make sure you fill the joint between the glass and the wood edge. It’s even best to get a very thin layer onto the glass. If you don’t fill the gap that is where the water will soak in. Take your time and do it right, you don’t want to repeat the process in 3 or 4 years. 10 years sounds better, better yet save some of that varnish and re-apply with a light sanding in 3 years.
If this is something you would rather not tackle your own or just don’t have the time. Please give us a call, Lake Area Painting & Decorating, we would be happy to help.
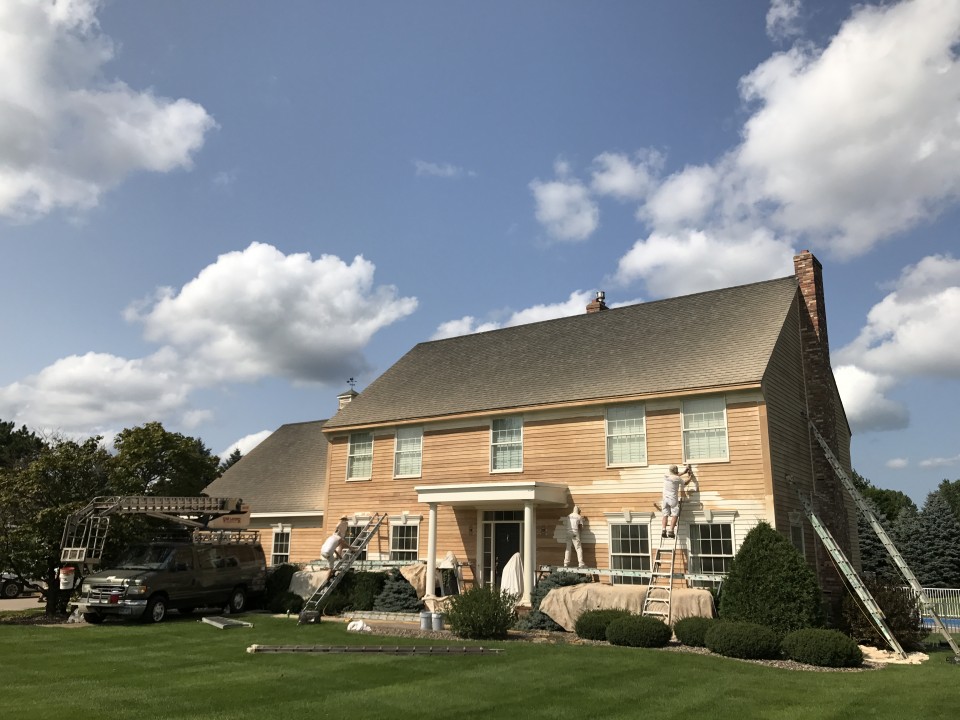
A paint job can only be as good as the surface we are painting over. Many layers of misapplied paint result in massive failure. All paint manufacturers and industry analysts agree that preparation on an existing painted house normally takes about 70% preparation and 30% painting, most painters and homeowners do quite the opposite. We are in the progress of removing all the paint from this home in North Oaks, Minnesota due to this problem. Preparation, preparation, and more preparation is the key to a long lasting paint job and that’s exactly what Lake Area Painting does!
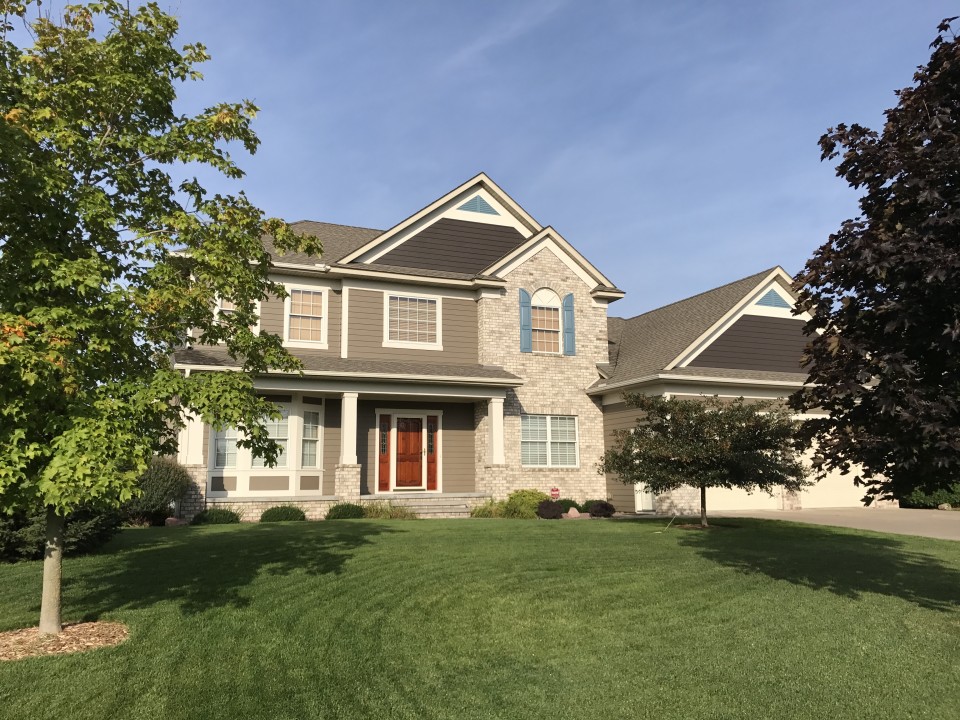
This home in Centerville, Minnesota and was only 10 years old, but the paint job looked like it was 20 years old. The original paint was of poor quality and was put on thin by an airless sprayer. It started to fade and oxidized within 3 years. Lake Area Painting & Decorating came to the rescue and power washed with hot water to cause and locate failure and to remove the oxidation, dirt, and mildew. We then painted with Aura Low Lustre paint and it was applied by brush this time around. The body color is Aura Fairview Taupe and the peaks are Night Horizon. What a difference with the two-tone color, this home really pops! We also stripped and refurbished the front entry door.
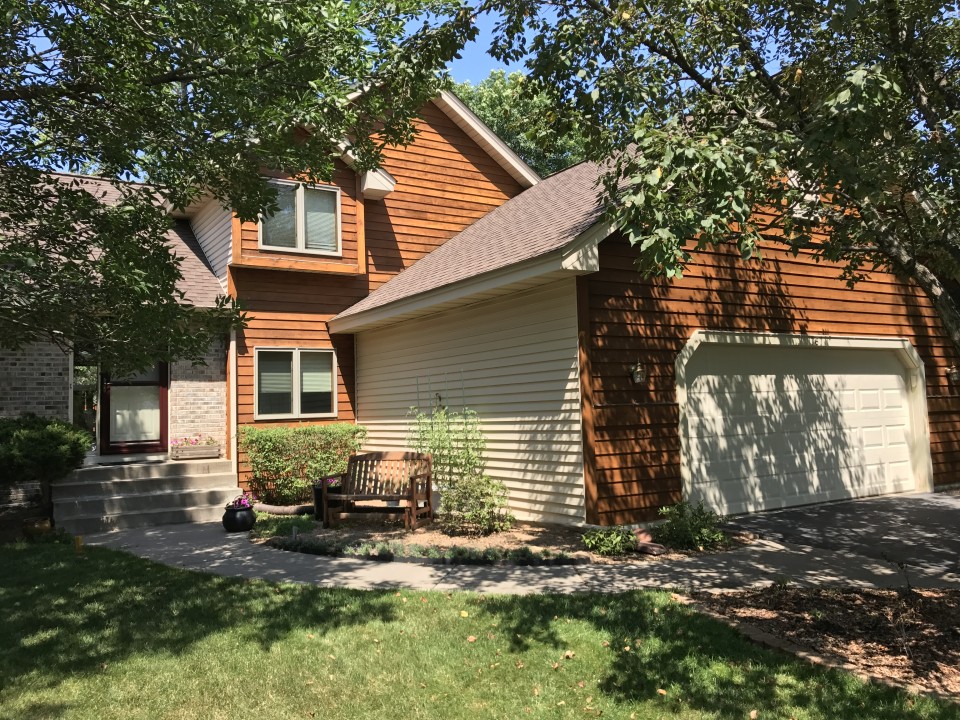
30 years we have been taking care of this customer. We have re-stained the wood siding every 10 years with a semi-transparent stain. The average life span for this type of product is 5 years. Preparing the surface is the key to any paint or stain job.